Not every representative of the fair sex received "as a gift" from nature strong and strong nails. But today this problem is easy to solve. It is enough to use the gel nail extension service. To do this, it is not necessary to visit the beauty salon and overpay for the work of the master, because you can carry out the procedure at home yourself.
Material Content:
Pros and cons of gel nail extension procedures
Before deciding on nail extension with gel polish, each girl needs to learn as much information about this process as possible. The procedure has its advantages and disadvantages.
Its indisputable advantages:
- this is an opportunity to quickly and effortlessly become the owner of nails of any length and shape;
- extension strengthens the nail plate;
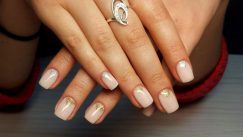
- after the procedure, the hands look especially impressive - stylish, well-groomed, neat;
- if the extension is done correctly, it will protect the nails for a while from the negative effects of the external environment;
- The procedure allows a woman to get rid of the bad habit of biting / biting her nails.
And the main advantage of gel building is that after it, a girl can long admire her ideal nails. On average, 15 days hands look amazing. A woman will not have to worry about constantly repainting them.
Cons of the procedure:
- regular “wear” of gel nails for several months leads to the fact that the natural nail plate is very thin, weak (it takes a lot of time and effort to fully restore it);
- even a qualified experienced craftsman will not be able to spend half an hour desired for the girls on the procedure.The entire process will take at least 90 minutes. Depending on the complexity of the chosen design, the procedure may take up to 3 hours. For impatient young ladies, this condition often becomes a real problem;
- for gel building you will have to pay the master a few times higher than for the usual salon manicure with ordinary varnish;
- approximately every three weeks, gel nails require correction, otherwise the manicure will lose its accuracy and attractiveness;
- if the correction is performed by an inept craftsman, a void may form between the gel layer and the natural nail plate. This is an ideal place for the development of various infections (most often a fungus “settles” in it).
In addition to the main disadvantages of gel building, each girl who decided on it, you need to know about the contraindications of the procedure under discussion.
It is forbidden to carry it out if a woman:
- He takes antibiotics, is undergoing chemotherapy.
- Has any nail disease.
- I noticed cuticle damage
In addition, nails after gel extension require special care. Otherwise, the manicure may be spoiled after a couple of days.
First of all, you need to use rubber gloves for any household / household work. Especially if all kinds of chemical detergents are involved in the process.
You can not bite the extended nails, use them as a screwdriver, or hit the tips of the plates on the keyboard or any hard surface. If the girl noticed the exfoliation of the gel, cracks, chips or other similar problems, you need to tell the master about them as soon as possible. At the initial stage, the shortcomings of manicure can be easily fixed.
Tools and materials for gel building
As noted above, gel building is quite an expensive procedure. Thrifty girls may well spend her at home on their own. But for home gel manicure it will be necessary to prepare qualitatively. First of all, make a list of what you need to build nails.

All products are best bought at trusted specialist stores. The sales assistant will be able to orient the girl right on the spot and help her choose the best tools and materials for gel nail extension. High price is not always an indicator of excellent quality.
Of the tools, you will first need to purchase an ultraviolet lamp. This is the most expensive product from the list, but the novice builder can’t do without it: the gel coating will simply not “freeze”. The simplest lamp can be bought for about 900-950 rubles. But usually for such savings, you have to wait for it from Chinese online stores.
Models with additional useful features will cost slightly more - 1.5-3 thousand rubles. But they are much more convenient in operation, for example, they are equipped with timer functions and device disinfection.
Do not do gel files without files and buffs. They are needed for thorough processing of the nail plate before applying special materials. Otherwise, the gel will not “connect” to the nail and immediately peel off. In addition, such tools allow you to change the shape of the nail to the desired, for example, make the tip of the plate square or oval. The best solution is to buy immediately the full set of discussed accessories. Usually it consists of 3-4 objects of different roughness. By the way, buff files can be taken in large quantities, if this will save. After all, they very quickly become worthless.
To make the nails really look neat and beautiful after building, they must be properly processed before the procedure. In this girl, a manicure set will help. It must have tools for removing cuticles and burrs.
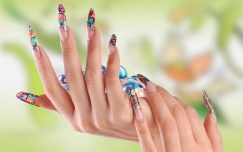
If you plan to originally decorate the extended nail plate, then you can not do without brushes of different shapes and thicknesses. Lint-free napkins and pieces of aluminum foil are also useful.These products are needed to remove the sticky layer of the finished gel coating.
When all the important and necessary tools for building are purchased, you can be puzzled by the choice / acquisition of materials for the procedure.
Do not do without the following:
- Basic gel polish. This is the main material for building. The product is a viscous, thick substance that hardens after exposure to ultraviolet rays from the aforementioned lamp. There are three types of such funds: single-phase gel, as well as two-and three-phase. For home use, the simplest is best suited - the first. Its cost starts from about 160 rubles.
- Primer. This tool is necessary for degreasing the nail plate. If you refuse to use it, the coating will bubble and “swell”. The safest is considered an acid-free primer. But its cost is quite high. An acid-containing analog negatively affects the state of the nail plate, but it costs an average of 100-150 rubles.
- Topcoat. This material is necessary to make manicure strong and significantly extend its life. It is on such a tool that you should not save.
- Color gel sculptor. Girls can choose any of its colors and shades to their liking. This gel also perfectly strengthens the nail plate.
- Degreaser. The tool is used to remove fat from the nail plate. It allows the gel to firmly fix on the nail. Instead of a special degreaser, you can take ordinary medical alcohol (concentrated!).
- Forms / tips and special glue for them. Such accessories will allow you to make a chic smooth manicure even to a novice master.
So that a beginner does not have to spend a couple of days walking around specialized stores, you can just buy yourself a starter kit of materials and accessories for gel building. The proposed complex includes immediately everything necessary for the procedure. True, its price will be slightly higher than the purchase of each necessary product separately.
It is interesting:how to paint nails
What to choose forms or tips
Forms are special "stencils" that are laid under the edge of the nail plate. They contain material for the extension procedure.
The most popular are paper disposable forms.
The table will help to deal with them:
| Type of form | Destination |
|---|---|
| Station wagon | This option is recommended to use for nails without defects of a standard form. Suitable for nails of any type. |
| Oval | It is best used when designing nails with elongated narrow plates. |
| Square | Suitable for nails with extraordinary proportions, for example, with a square box. It is convenient to use for the design of flat plates. |
More economical are metal forms. They are suitable for reusable use. True, with paper accessories, the manicure is more neat and beautiful, because the master will be able to "customize" them under any nails.
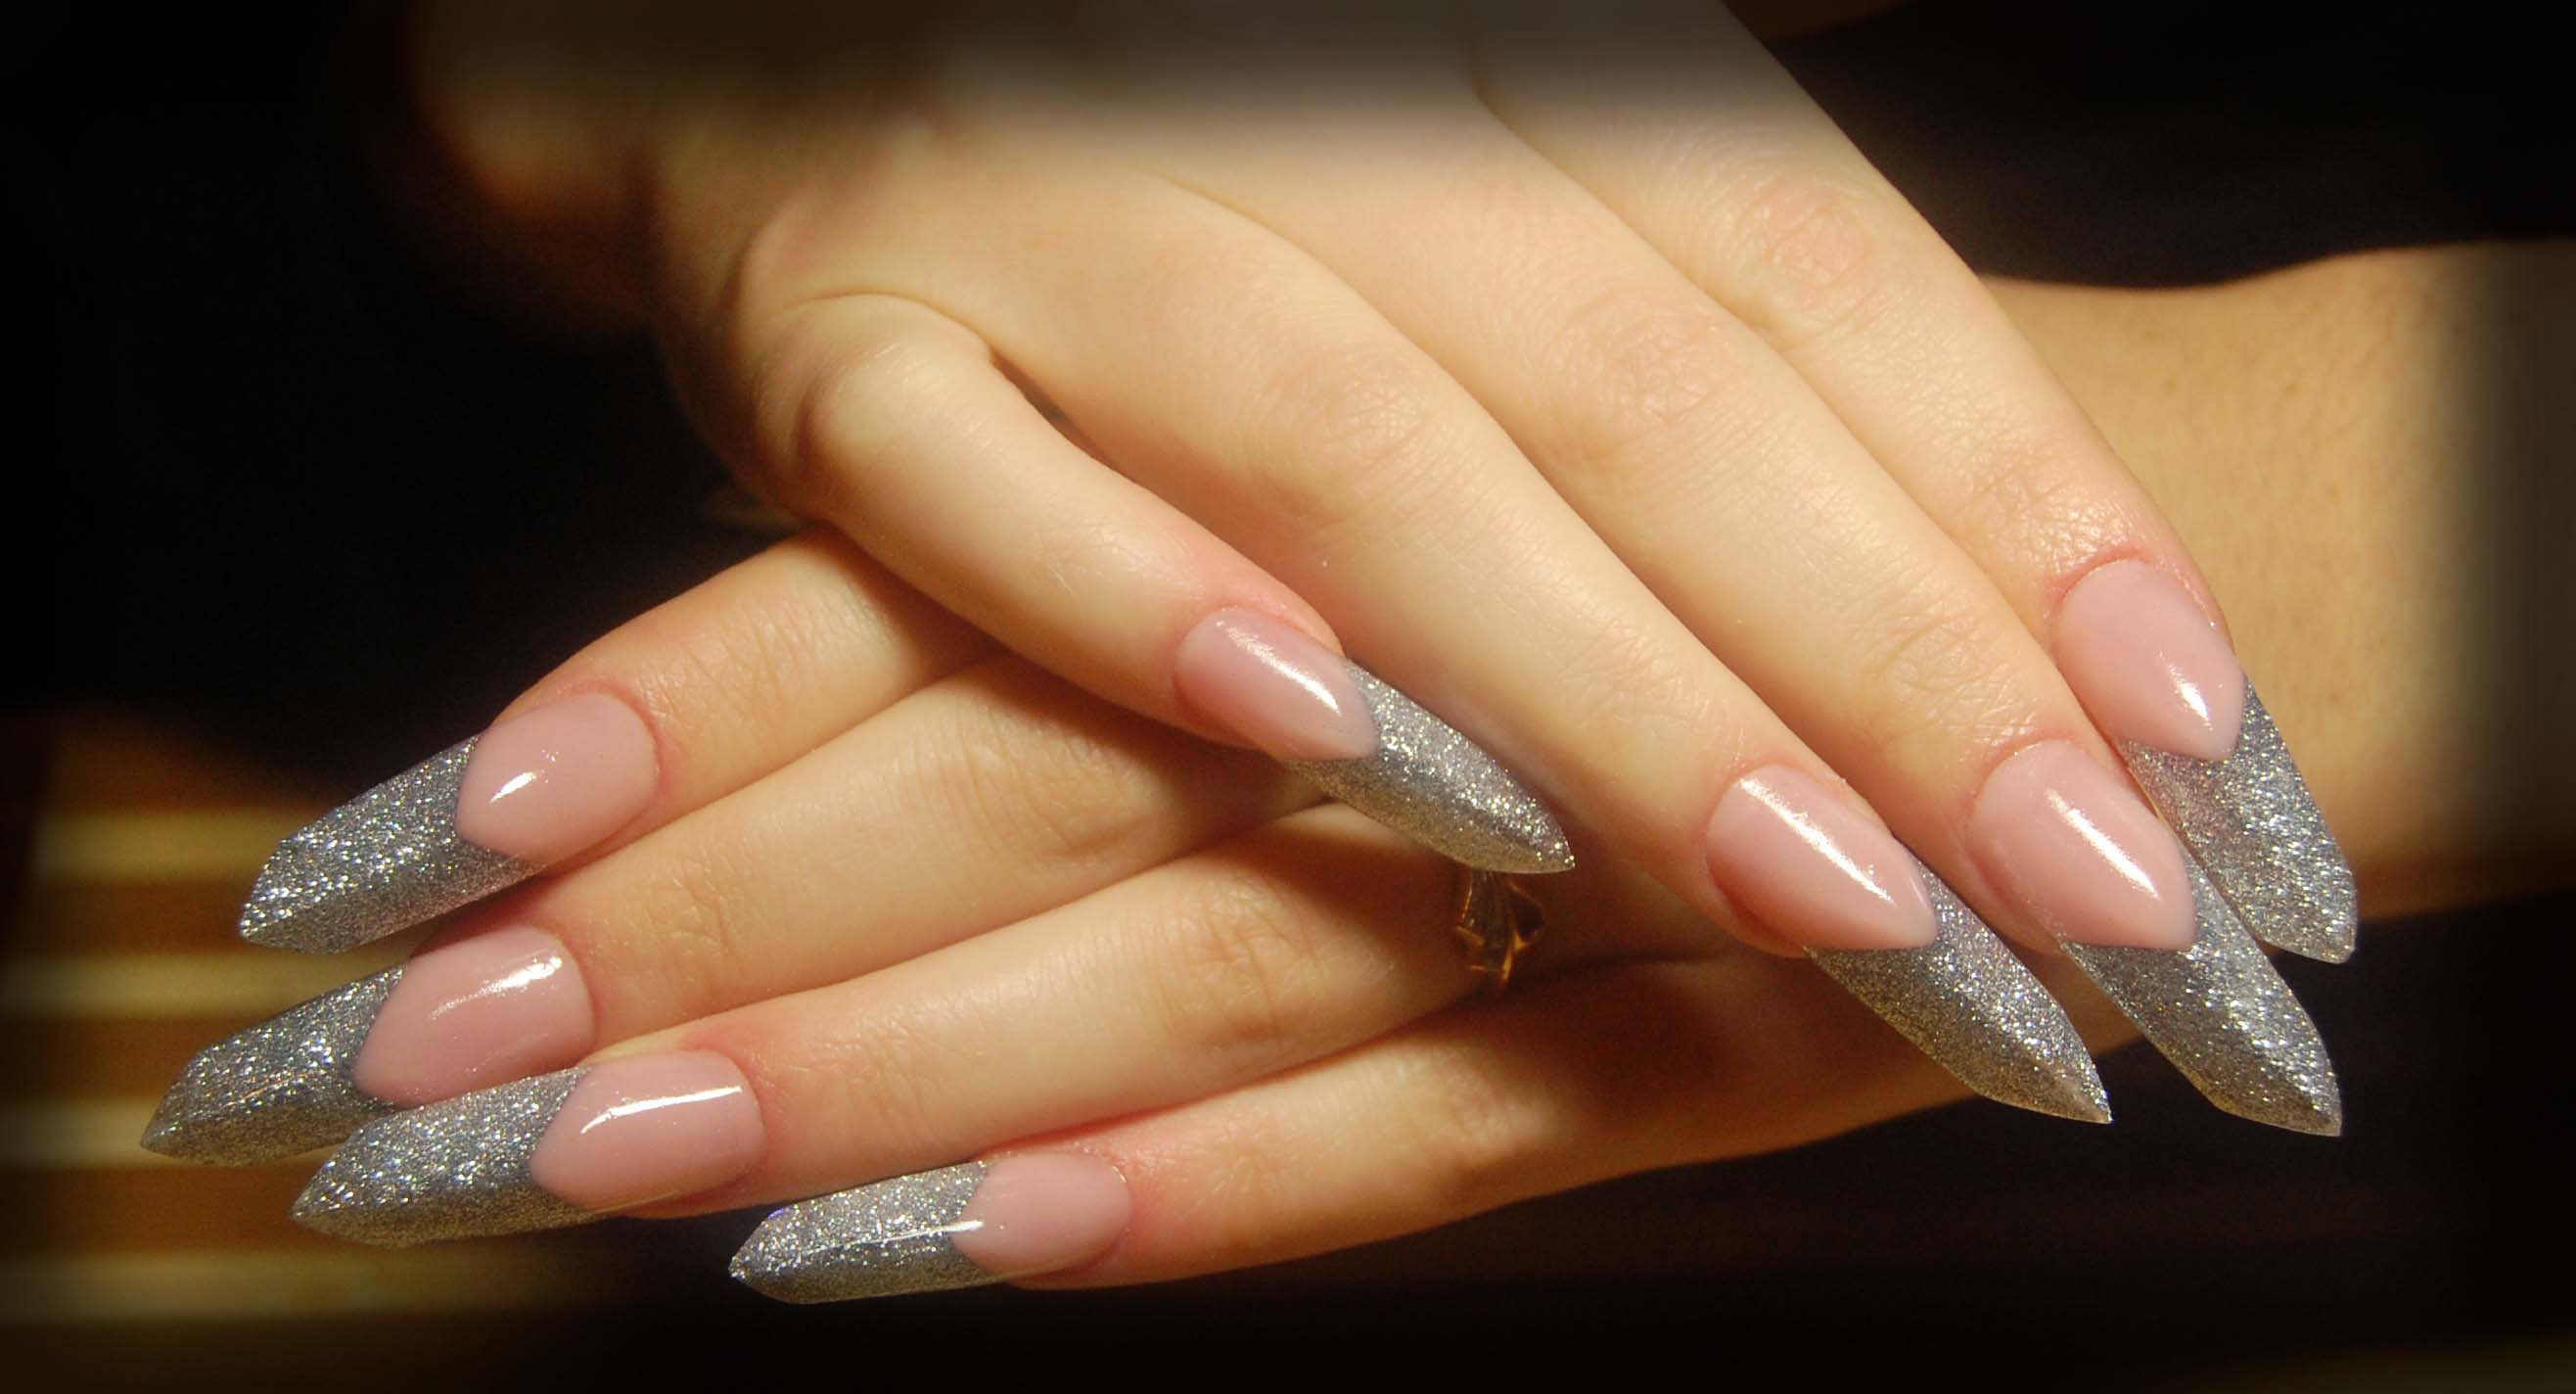
Tips are plastic products that allow you to give the right length and shape to your manicure. They come in different shapes: classic, narrowed, straight and others. Options differ among themselves still in length, in the zone of attachment to the nail, color. Today in stores you can find such products not only in natural color, but also in color and immediately complemented by design.
It is usually difficult to figure out what is better - forms or tips and which option to use when building. First of all, for this you need to assess the condition of the nails. If they have the correct beautiful shape, you can use the accessory that was at hand or managed to buy cheaper. There will not be much difference in the application of forms / tips.
If the nail plates have any features, then they must be taken into account when choosing tools for building:
- for flat wide nails, it will not be possible to find tips, of a suitable size, so it is better to take forms immediately;
- it is best to apply tips with a small contact zone on bitten plates;
- for bent down nails, forms are well suited (they will need to be selected under a natural plate along the “smile” line);
- for spring-shaped nails, it is worth taking tips, but first cut off the free edge of the plate, making it thinner.
It is not easy for a novice master to make the right choice in the matter under discussion.
If there is such an opportunity, it is better to consult a professional first.
Step-by-step instruction for beginners
There are two types of step-by-step instructions for beginner builders. Among them - using tips and using forms. They have some serious differences.
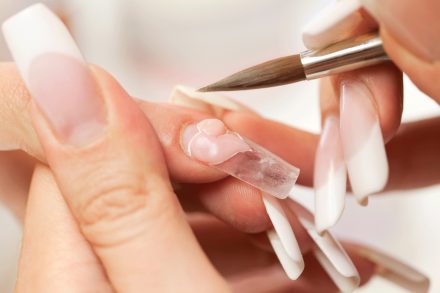
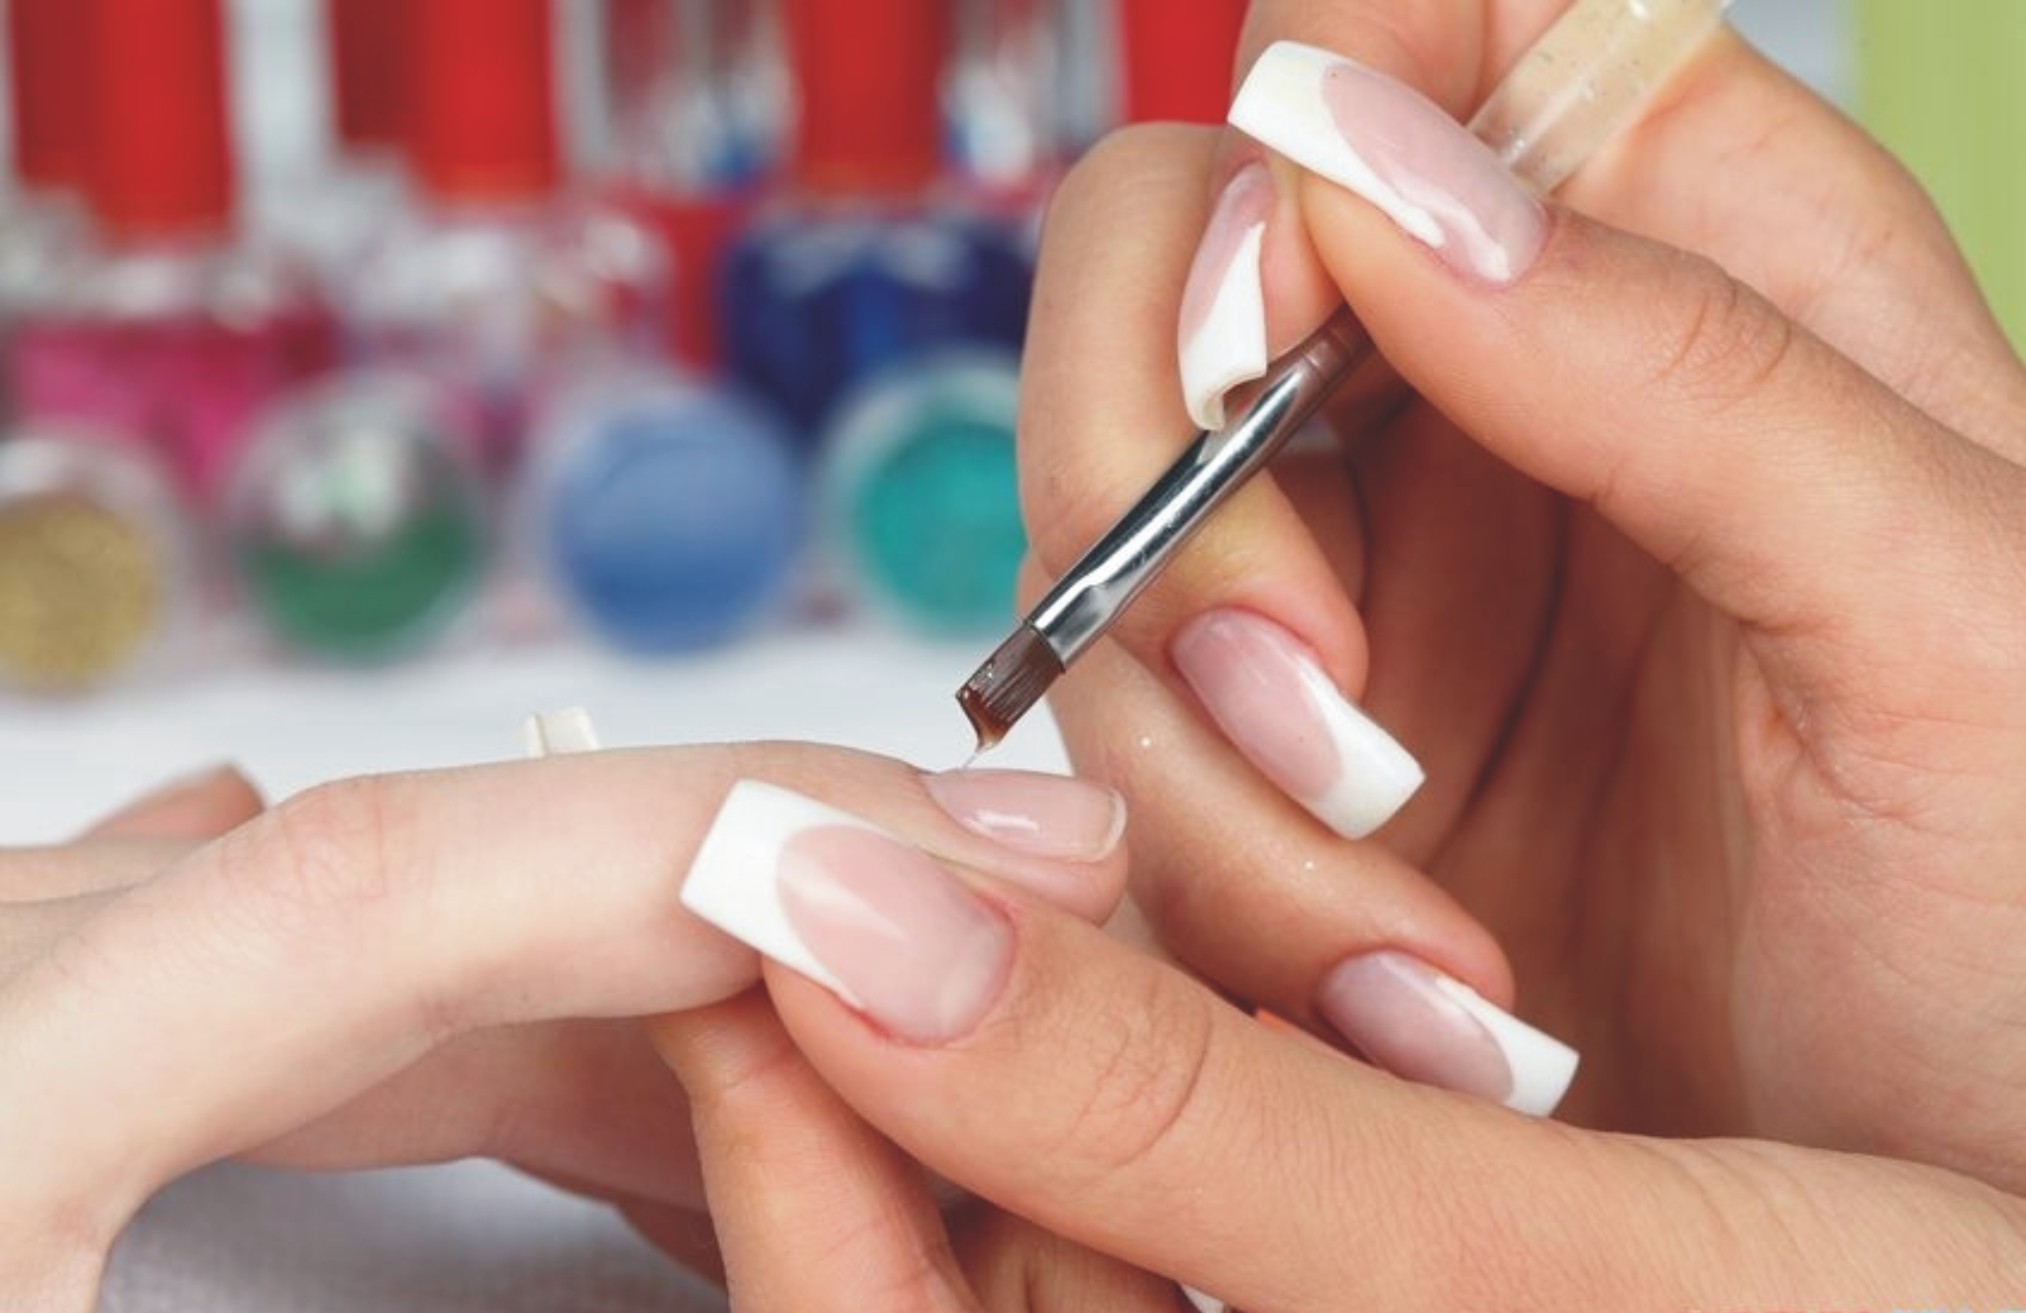
To carry out the extension procedure on tips you need:
- Wash hands thoroughly and, preferably, use a quality antiseptic.
- To prepare the “field” for work: to move the cuticle, to achieve the desired shape of the vacated hole, and then to the edge, to grind the surface. For this, a 220/280 grit file is taken (the shape of the tool is rectangular).
- Coat the nail with a degreaser.
- Apply a special layer of special glue for tips and attach the accessory to the plate with a thin layer. Hold it for 8-10 seconds.
- Give your tips a form.
- Remove dust particles with special wipes, use a degreaser again.
- Coat the entire plate with base gel. Hold the nails under the lamp for 60 seconds.
- Apply a gel sculptor with a flat brush and leave the nails under the lamp for 180 seconds.
- Use a lint-free cloth with a degreaser to remove the sticky layer.
- Buff with a buff the entire area of the nail.
- Repeat the treatment with a degreaser and “paint” the plate with a finish coating.
- Hold the nails under the lamp again for 180 seconds.
Immediately after completing the procedure, do not start washing, cleaning or in any other way “disturb” the fresh manicure.
Need to give him a few hours to "rest".
To carry out the extension procedure on the forms, it is necessary:
- Wash and sanitize hands.
- To clean nails with a file (at this stage its option 220 grit is used).
- Treat with degreaser.
- Cover nails with foundation. Leave them under the lamp for 120 seconds.
- Clean top coat. Attach a form.
- Using a brush, apply the gel, turning the fingers down with the nails. This is necessary for uniform distribution of the material.
- Leave the nails under the lamp for 180 seconds.
- Coat with gel again.
- Carefully remove the sticky layer.
- Remove the mold and align the cover with a buff.
- Remove dust particles and cover your "creation" with a finishing gel.
- At the very end, you need to dry the result for 120 seconds, and then work with a degreaser.
Which is safer, acrylic or gel
It is difficult to say unequivocally that it is safer gel for nail extensions or acrylic. If we talk about the latter, then the masters love it for its density, elasticity, and the possibility of "freezing" without additional equipment. True, the material dries out very quickly and it is difficult to correct the mistakes of a novice master on it.
Acrylic is removed by soaking nails in a special solution. Most of all in such material of clients the pungent smell frightens. Immediately there is a feeling that acrylic is much more harmful and dangerous than gel. In fact, their compositions are similar. By chemical affiliation, these products come from the same “family”.
The gel is good because it fits perfectly on the nail without tubercles and other defects. Irregularities do not have to be cut manually, as when using acrylic. The gel surface is glossy and glistens beautifully for 2-3 weeks. During the build-up with such material there is no sharp unpleasant odor.
The gel hardens only when using an ultraviolet lamp, so the master has the opportunity to bring the coating to the ideal and only then fix it.
Since there is no particular difference between gel and acrylic in terms of composition safety, it’s worth choosing between them, given the conditions under which the procedure is planned.If this is a small room in the apartment, there are also animals and children in it, then you should not torment them with a sharp chemical smell, it is better to choose a “non-aromatic” gel. Acrylic is considered indispensable only for complex modeling and creating volumetric patterns on the nails. And the novice master is unlikely to dare to take up such design options, and even at home.
How to restore nails after the procedure
Modern gel polishes have a safe composition that does not bring much harm to natural nail plates. The main cause of brittleness and weakness of nails after the procedure under discussion is precisely grinding with nail files of various degrees of roughness. For example, in the process it is easy to overdo it and make the plate too thin (especially for an inexperienced master). In this case, it will take a lot of time, effort and money to restore it.

It should also be borne in mind that under a dense layer of strong material, nails cease to receive useful substances that usually came to them, for example, through a cream. All this significantly worsens the condition of the nails.
If a girl has repeatedly increased her nails (for 3-4 months), after the next removal of the gel layer, they definitely need a “respite” for at least a month.
During this period, you need to help the nail plates recover using special tools and procedures:
- An affordable nail care product is cosmetic petroleum jelly. It must be rubbed every 3-4 hours. The entire surface of the nail plate is processed. It is advisable to leave the product all night. Cotton gloves will not help stain the bed.
- It will be useful to rub any oil for about half an hour a day. Corn, avocado and olive are best. Useful baths can also be made from them. To do this, pour vitamins A and E into the base (1-2 drops each), warm the composition and lower the nails into it for a quarter of an hour.
- You have to deal with your daily menu. First of all, increase the amount of protein products in it. Be sure to eat a large amount of dairy / sour-milk products and lean meat. A positive effect on the state of nails and porridge, but not quick cooking, but self-made linseed and oatmeal.
- Well-prepared products for restoring the nail plate are also suitable, for example, a special varnish with vitamins and other useful substances in the composition. The “Smart Enamel” series is popular among modern healing products for nails. Such varnishes are sold in pharmacies and in cosmetic stores. The course of treatment using their restorative mixture should last at least 15 days. Every day you need to wash the coating and replace it with “fresh”.
During the period of rest, it is advisable to completely abandon the use of ordinary colored varnish. If this does not work, then under it you must always apply a special healing base. Every 3-4 days, you need to remove the coating and again give the nail plate a rest for a couple of days. It is important to use products with gentle compounds to remove varnish and any other coating. They should not have formaldehyde and acetone. The listed components “suck” moisture from an already weakened dehydrated nail plate. As a result, her condition only worsens.
Ideally, the duration of the nail repair phase after removing the gel polish is 2.5-3 months. During this time, you will be able to return your pens to their previous completely healthy state. Over the specified period, it is not recommended to grow nails. The free edge must be cut immediately.
But most of the fair sex can not stand such a long time without a beautiful manicure. If you really can’t wait to go for the next building, you need to wait at least 1 month. And be sure to use restorative means all this time. It is also advisable to make masks, baths, nourishing and strengthening nails.
The nail extension procedure allows you to become the owner of a beautiful long manicure in a couple of hours. You can carry it out yourself. Despite the need to purchase a large number of tools and materials, in the end, you will still be able to save a lot on visiting professional nail studios.


