The puzzle, invented as a visual aid to algebraic theory, suddenly captivated the whole world. For decades now, people far from higher mathematics have been gambling fiercely over a complex and fascinating task. The Magic Cube is a great tool for developing logical thinking and memory. Those who first wondered how to collect the Rubik's Cube, diagrams and comments will help support enthusiasm, and perhaps discover the world of speedcubing.
Material Content:
- 1 Secrets of building a Rubik's Cube: elements, parts, key concepts
- 2 The structure of the Rubik's Cube and the names of the rotations
- 3 Schemes and stages of assembling puzzles for beginners
- 4 The fastest way. Jessica Friedrich Method
- 5 How to collect a Rubik's Cube with closed eyes
- 6 Who owns the record for the fastest Rubik's cube assembly
Secrets of building a Rubik's Cube: elements, parts, key concepts
The six faces of the puzzle have certain colors and the order of their arrangement, patented by the inventor. Numerous fakes often reveal themselves as unusual colors or their position relative to each other. Learning schemes and descriptions always use standard color schemes. It is quite easy for beginners to get confused in the explanations if you use a cube with a different color scheme.
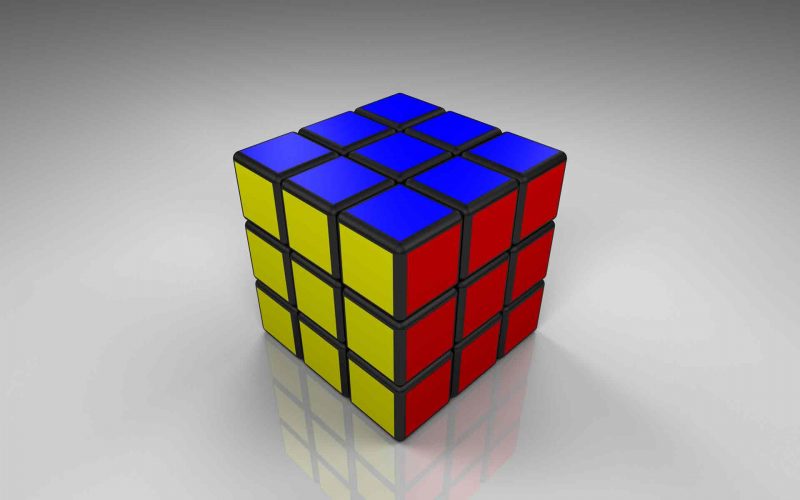
Colors of opposite faces: white - yellow, green - blue, red - orange.
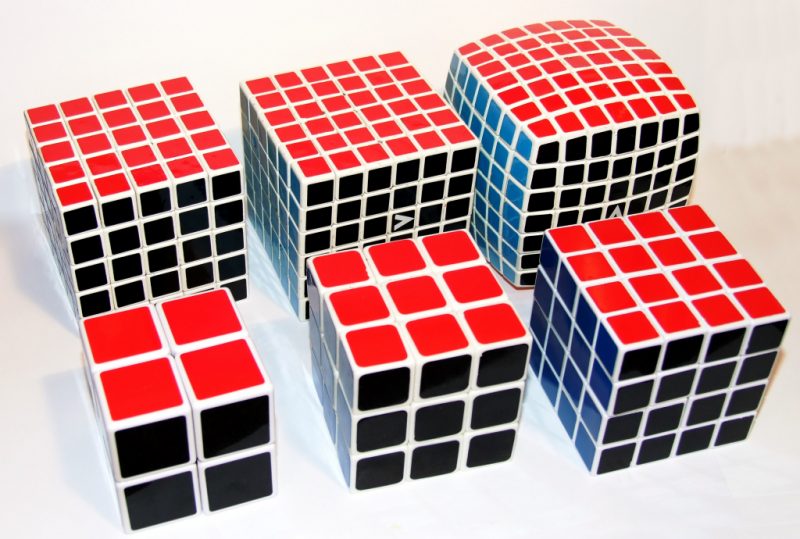
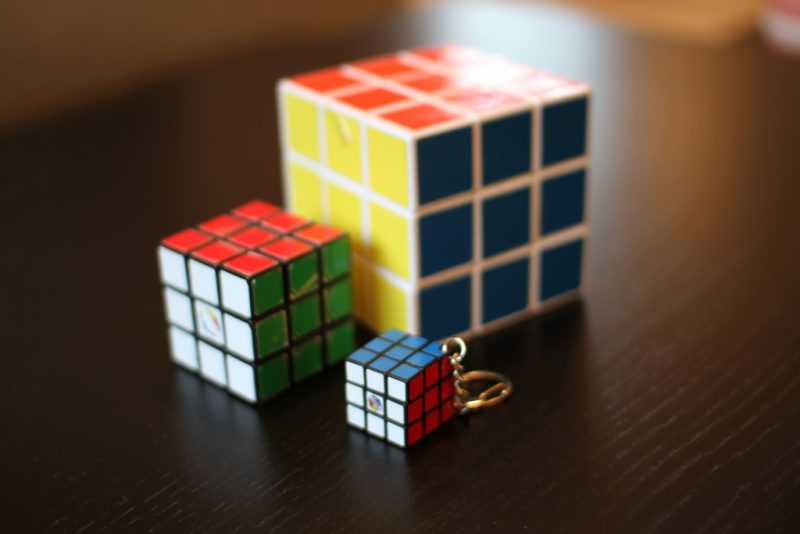
Each side consists of several square elements. By their number, types of Rubik's cubes are distinguished: 3 * 3 * 3 (the first classic version), 4 * 4 * 4 (the so-called "Rubik's Revenge"), 5 * 5 * 5 and so on.
The first model, assembled by Erno Rubik, consisted of 27 wooden cubes, equally painted in six colors and stacked on top of each other. Within a month, the inventor tried to group them so that the faces of a large cube were made up of squares of the same color. The development of a mechanism that held all the elements together took even more time.
The modern Rubik's cube of a classic design consists of the following elements:
- The centers are the parts motionless relative to each other, fixed on the axis of rotation of the cube. They face the user with only one painted side. Actually, six centers form mirror pairs in the color scheme.
- Ribs are movable elements. The user sees two colored sides at each edge. Color combinations are also standard here.
- Corners - eight movable elements located at the vertices of a cube. Each of them has three colored sides.
- The fastening mechanism is a cross of three rigidly fixed axes. There is an alternative mechanism similar to a sphere. It is used in high-speed or multi-element cubes. The construction of cubes with an even number of elements on the faces is especially complicated - this is a system of interconnected click mechanisms, sometimes combined with a cross. There are magnetic gears for professional speed cubes.
The game with the Rubik's Cube is that with the help of the movable mechanism the colored elements on the faces are reordered and try to assemble in the original order.
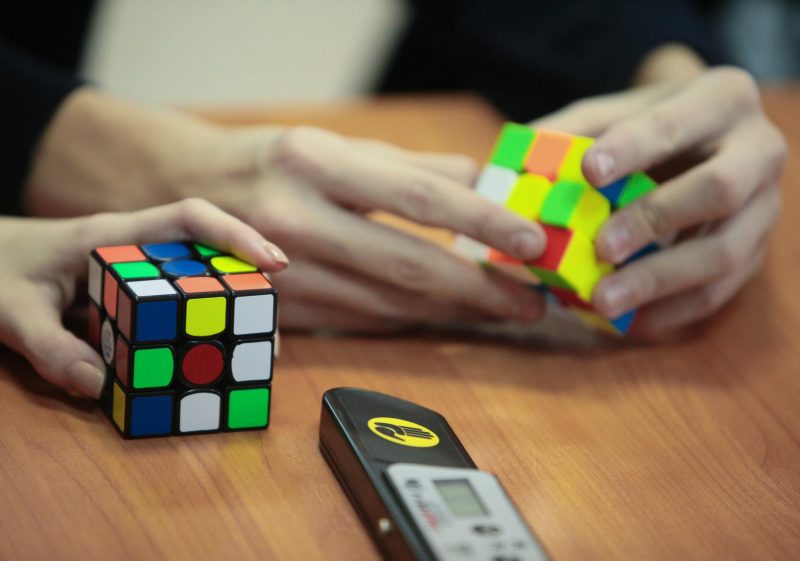
Puzzle fans compete in the solution of time. In addition to sleight of hand, for this it is necessary to study, remember and bring to automatism hundreds of combinations of colored elements and actions with them. This unusual sport is called speedcubing.
Speedcubers tournaments are held regularly, records are updated. New horizons for achievements are constantly opening up. As part of the tournaments, competitions are held for the assembly of blindly, with one hand, legs and so on.
The newest hobby is the assembly of solitaire (patterns) on a cube.
The structure of the Rubik's Cube and the names of the rotations
In order to describe manipulations with a puzzle, write down decision schemes, movements of elements relative to each other, and just for the convenience of communication, a language of rotations was created. It is a letter designation for each face and for the ways of its rotation.
The sides of the puzzle are capitalized.
In Russian-language manuals for assembling the Rubik's Cube, use the initial letters from Russian names:
- F - from the "facade";
- T - from the "rear";
- P - from the "right";
- L - from the "left";
- B - from the “top”;
- N - from the "bottom".
The international community uses the initial letters from the names of the faces in English.
Designations accepted by the WCA (World Cube Association):
- R - from right;
- L - from left;
- U - from up;
- D - from down;
- F - from front;
- B - from back.
The central element is called the same as the face (R, D, F, and so on).
The edge is adjacent to two faces, its name consists of two letters (FR, UL and so on).
The angle, respectively, is described by three letters (for example, FRU).
The groups of elements that make up the middle layers between the faces also have their own names:
- M (from middle) - between R and L.
- S (from standing) - between F and B.
- E (from equatorial) - between U and D.
Rotation of faces is described by letters that name faces and additional icons.
- The apostrophe “’ ”indicates that the face or layer rotates counterclockwise.
- The number 2 indicates the repetition of the movement.
Possible actions with the face, for example, with the right:
- R - rotation clockwise;
- R ’- counterclockwise rotation.
- R2 is a double turn, no matter which direction, since the face has only four possible positions.
To determine which way to turn a face, you need to present the watch dial on it and be guided by the movement of an imaginary hand.
The rotation of the opposite faces "clockwise" is obtained counter.
The movements of the middle layers are tied to the outer faces:
- Layer M rotates in the same directions as L.
- Layer S is like F.
- Layer E - like D.
Another important designation of “w” is the simultaneous rotation of two adjacent layers. For example, Rw is the simultaneous rotation of R and M.
The turns of the whole cube are called intercepts. They are performed in three planes, that is, along three coordinate axes: X, Y, Z.
- x and x ’are the X-axis rotations of the entire cube. The movements coincide with the turns of the right side.
- y and y ’are the rotations of the cube along the Y axis. The movements coincide with the rotations of the upper face.
- z and z ’- rotation of the cube along the Z axis. The movement coincides with the rotation of the frontal face.
- x2, y2, z2 - designations of double intercepts on the specified axis.
In addition to generally accepted notations, assembly manuals are full of slang, the names of techniques, techniques, algorithms, patterns and figures on a cube that are popular among speedcubers and so on. Schematic descriptions of algorithms that use only arrows are no less in demand. The more experience gained in solving the puzzle, the easier it is to understand descriptions and explanations, many things begin to be perceived intuitively.
- Cap - colored elements collected on one side of the cube. Assembling a puzzle is the same as assembling all six caps.
- Belt - colored elements adjacent to the cap. The cap can be assembled so that the belt consists of disparate color fragments, that is, the corner and rib elements are not in place.
- Cross - a figure on a hat of five fragments of the same color. Assembling often begins with building a cross. There is no clear guide. This step allows the greatest freedom of action and requires some thought. When the cross is ready, it remains to follow the learned algorithms.
- Flip - turning a corner or edge in one place relative to the center, this action requires the use of special algorithms.
Schemes and stages of assembling puzzles for beginners
Schemes for beginners will help you learn and save your nerves by collecting a hopelessly tangled cube, feel the logic of movements and work out the simplest algorithms.
Before you perform any action, you must examine the cube. In competitions, “pre-inspection” takes 15 seconds. During this time, you need to find elements of the same color, which will be collected in a “hat” at the first stage. Traditionally, they start from the white side, that is, most manuals assume that U is white. “Multicolorists” speedcubers can start assembling from any direction, mentally rebuilding all the ready-made algorithms.
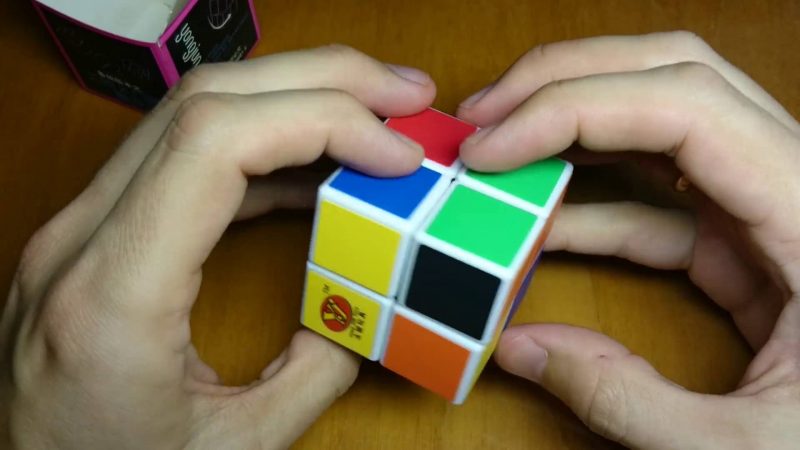
Rubik's Cube 2x2
“Mini cube” consists of 8 corner elements. At the first stage, one layer of four corners is collected. At the second stage - the remaining corners are placed in their places, while they can be turned upside down, that is, colored elements will not be on their faces. It remains to deploy them the right side.
- The “bang-bang” algorithm allows you to move the corner element and correctly orient it. If you do this sequence of actions six times in a row, the cube will return to its original position. Thus, if the cube is mixed, you need to apply it from 1 to 5 times to set the element correctly. Algorithm Record: RUR’U ’.
- When one layer is assembled, it is necessary to turn the cube with the second layer up. Moving this layer in any direction, set one of the corners in their place. Next, an algorithm is applied that allows you to swap two adjacent elements - the right and left corners of the front face. The sequence of actions is as follows: URU’L’UR’U’LU.
- When all the corners are in place, they are flipped (flipped) using the “bang-bang” algorithm. At this point, it is important not to intercept the cube.
How to collect a Rubik's Cube 3x3

- Build a “white cross” by collecting 4 edges with white stickers around the white center.
- Combine the color centers of the sides R, L, U, D with the matching edges of the “white cross”.
- Put the corners in place with white stickers. Using the R’D’RD algorithm, repeated up to five times, the corners will flip to the correct position.
- To put in place the edges of the middle layer, you need to intercept the cube - y2. Select rib without yellow sticker. Combine it with the center, matching in color on one side. Using formulas, shift the edge to the middle layer: The edge drops to the left: U’L’ULUFU’F ’. The edge drops to the right: URU’R’U’F’UF.If an element is in its place but incorrectly rotated, these algorithms are used again to move it to the third layer and reinstall it.
- Without intercepting the cube, collect the yellow cross on the cap of the third layer, repeating the algorithm: FRUR’U’F ’.
- Combine the edges of the last layer with the side centers correctly, as was done for the first cross. Two ribs easily fall into place. The other two will have to be swapped.If they are against each other: RUR’URU2R ’. If on adjacent sides: RUR’URU2R’U.
- Position the corners of the last face on the correct positions. If none of them is in the right place, apply the URU’L’UR’U’L formula. One of the elements will stand correctly. To intercept the cube at this angle to itself, it will be the upper right on the frontal edge. Move the remaining corners counterclockwise to URU’L’UR’U’L or, conversely, U’L’URU’LUR ’. At this stage, all the collected sites will be rebuilt, it seems that something went wrong. It is important to ensure that the die does not roll over and the center of F does not move relative to the user. The combination of moves must be repeated up to 5 times.
- You may need to expand the corner elements by aligning the color fragments with the rest of the faces correctly. To expand (flip) them, the first formula is used: R’D’RD. It is important not to intercept the cube so that F and U do not change.
Rubik's Cube 4x4
Puzzles with more than three elements in an edge involve a much larger number of combinations.
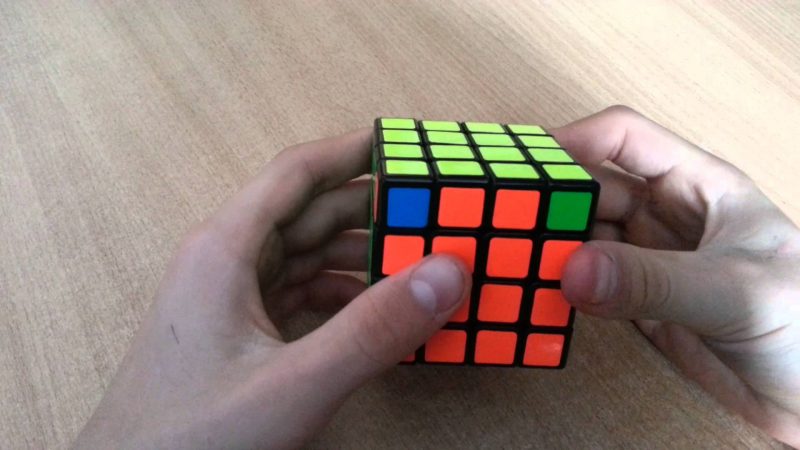
Especially difficult are the “even” options, since they do not have a rigidly fixed center that helps navigate the classic puzzle.
For 4 * 4 * 4, about 7.4 * 1045 element positions are possible. Therefore, he was called "Rubik's revenge" or Master Cube.
Additional designations of the inner layers:
- f - internal frontal;
- b - inner rear;
- r is the inner right;
- l - inner left.
Assembly options: layer by layer, from corners or by casting to 3 * 3 * 3. The latter method is the most popular. First, four central elements are collected on each face. Then the rib pairs are adjusted and, finally, the angles are set.
- When collecting central elements, one must remember what colors are contrasted in pairs. Algorithm to swap elements from the middle four: (Rr) U (Rr) ’U (Rr) U2 (Rr)’ U2.
- When assembling the ribs, only the outer faces rotate. Algorithms: (Ll) ’U’ R U (Ll); (Ll) ’U’ R2 U (Ll); (Ll) ’U’ R ’U (Ll); (Rr) U L U ’(Rr)’; (Rr) U L2 U ’(Rr)’; (Rr) U L ’U’ (Rr) ’. In most cases, ribs can be assembled intuitively. When there are only two edge elements left: (Dd) R F ’U R’ F (Dd) ’- to set them side by side, U F’ L F ’L’ F U ’- to swap them.
- Next, 3 * 3 * 3 cube formulas are applied for permutation and rotation of the corners.
Complex cases that require a special solution are parities. Their formulas do not solve the problem, but knock out elements from a deadlock situation, bringing the puzzle into a form solved by standard algorithms.
- Two adjacent rib elements in the wrong orientation: r2 B2 U2 l U2 r ’U2 r U2 F2 r F2 l’ B2 r2.
- Opposed pairs of rib elements in the wrong orientation: r2 U2 r2 (Uu) 2 r2 u2.
- Pairs of rib elements facing each other in the wrong orientation: F ’U’ F r2 U2 r2 (Uu) 2 r2 u2 F ’U F.
- The corners of the last layer are out of place: r2 U2 r2 (Uu) 2 r2 u2.
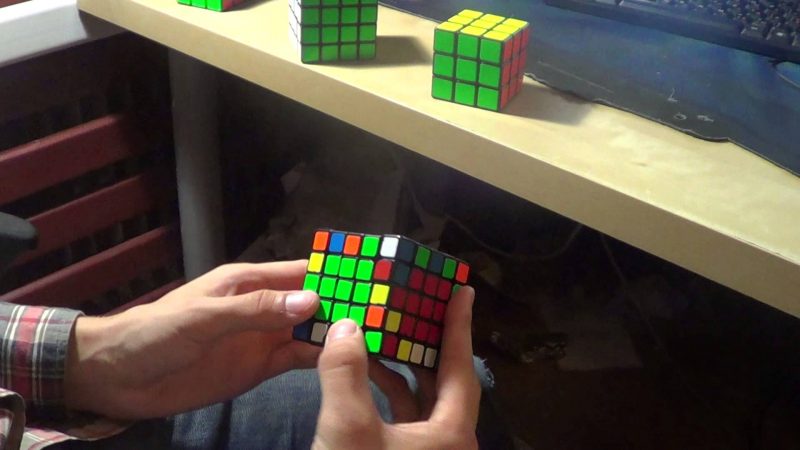
5x5 quick puzzle assembly
Assembly is to bring to a classic look. First, 9 central fragments are collected on each cap and three rib elements. The last stage is the alignment of angles.
Additional designations:
- u is the inner upper face;
- d is the inner lower bound;
- e is the inner line between the upper and lower;
- (two faces in brackets) - simultaneous rotation.
The assembly of the central elements is easier than in the previous case, since there are rigidly fixed color pairs.
- At the first stage, difficulties can arise if you need to swap elements on adjacent faces. If they are separated by one edge element: (Rr) U (Rr) ’U (Rr) U2 (Rr)’. If they are located on the inner center layers: (Rr) ’F’ (Ll) ’(Rr) U (Rr) U’ (Ll) (Rr) ’.
- The combination of rib elements is intuitive, it does not affect the collected centers: (Ll) ’U L’ U ’(Ll); (Ll) ’U L2 U’ (Ll); (Rr) U ’R U (Rr)’; (Rr) U ’R2 U (Rr)’. The complexity is only the assembly of the last two edges.
Parity Formulas:
- swap elements in layers u and d on the edges of one face: (Dd) R F ’U R’ F (Dd) ’;
- swap the edge elements located in the middle layer on one face: (Uu) 2 (Rr) 2 F2 u2 F2 (Rr) 2 (Uu) 2;
- deploy these elements in their places, that is, flip: e R F ’U R’ F e ’;
- deploy in place the rib element of the middle layer: (Rr) 2 B2 U2 (Ll) U2 (Rr) ’U2 (Rr) U2 F2 (Rr) F2 (Ll)’ B2 (Rr) 2;
- swap elements in the lateral layer on one face: (Ll) ’U2 (Ll)’ U2 F2 (Ll) ’F2 (Rr) U2 (Rr)’ U2 (Ll) 2;
- flip simultaneously three ribs in place: F ’L’ F U ’or U F’ L.
The last task is to arrange the corners according to the principle of a classic cube.
The fastest way. Jessica Friedrich Method
Those who have already learned to solve the puzzle in 1 - 2 minutes, that is, can really quickly assemble the Rubik's cube, come to a fundamentally new understanding of the problem. Mechanical acceleration at a certain stage becomes impossible. Special algorithms and techniques are needed to reduce the search time for solutions.
Layering the classic version to speed up the process comes down to four tasks:
- initial cross on one hat;
- simultaneous assembly of the first and second layers;
- last hat;
- belt of the third layer.
The difficulty is that you have to learn and keep in mind 119 formulas compiled by the author of the method, Jessica Friedrich. The groups of algorithms F2L, OLL, PLL for each stage describe all possible combinations of the arrangement of elements, turns and permutations necessary for working with edge-angle pairs.
The method allows you to solve the puzzle in less than 20 seconds.
How to collect a Rubik's Cube with closed eyes
Special techniques have been developed to facilitate this task. One of the popular among the speedcubers is the old Pochmann method.
The assembly is carried out not in layers, but in groups of elements: first all the edges, then the corners.
Rib RU - buffer. Using special algorithms, the cube occupying this position is moved to its place. The element that replaced it in the RU position is again moved, and so on, until all the edges are in place. Do the same with corners. A feature of blind assembly algorithms is that they allow you to move an element without mixing the rest.
In the process of blind assembly, the cube is not turned over so as not to get confused.
Before proceeding with the assembly, the cube is “remembered”. Mentally creates a chain along which the elements will move. Each sticker is assigned its own letter of the alphabet. For edges and for corners, the speedcuber is a separate alphabet. The mixed Rubik's cube is remembered as a sequence of letters. The top sticker on the buffer cube is the first letter, the sticker that takes its rightful place is the second and so on. For simplicity, words are composed of a sequence of letters, and sentences are composed of words.
Who owns the record for the fastest Rubik's cube assembly
Australian Felix Zemdegs twice updated the world record for assembling the classic Rubik's Cube in 2018. At the beginning of the year, the best time was recorded for 4.6 seconds, in May the puzzle was solved in 4, 22 seconds.
The 22-year-old athlete owns several more current records 2015 - 2017:
- 4x4x4 - 19.36 seconds;
- 5x5x5 - 38.52 seconds;
- 6x6x6 - 1: 20.03 minutes;
- 7x7x7 - 2: 06.73 minutes;
- megaminx - 34.60 seconds;
- with one hand - 6.88 seconds.
The robot record recorded in the Guinness Book of Records is 0.637 seconds. There is already an existing model that can assemble a cube in 0.38 seconds. Its developers are the Americans Ben Katz and Jared Di Carlo.


