Often at the table, many refuse herring, despite its advantages and taste. The reason for this is the abundance of bones in the fish. But choosing an acceptable way for yourself how to clean herring quickly and simply, you can more often enjoy it and not be quietly horrified before preparing Herring under a fur coat salad.
Material Content:
5 ways to quickly clean herring
The following cooking tools are used to clean herring from bones: a sharp knife, kitchen scissors and a cutting board. Below are the step-by-step technologies of different options for cleaning fish from bones, which will help any housewife to cope with the task.
The classic way to clean
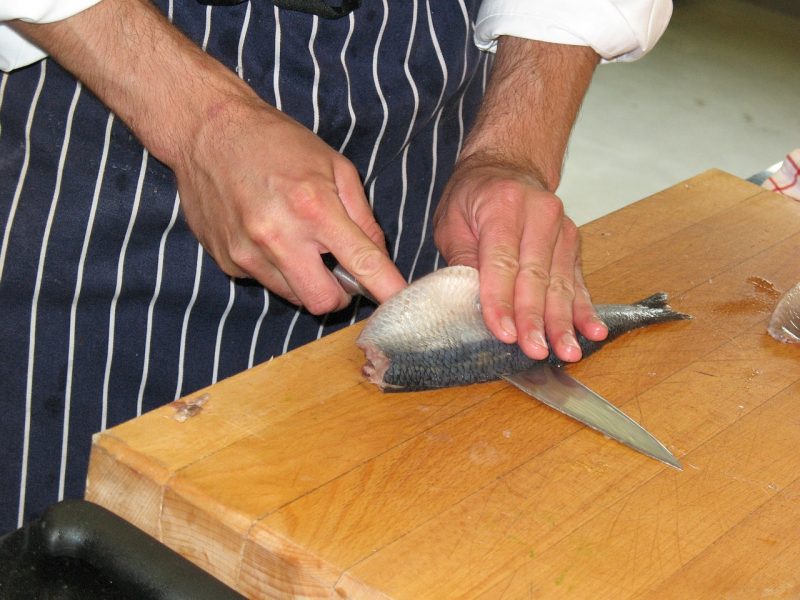
This is a proven way to get a beautiful and neat herring fillet. For its implementation, it will be enough to use a sharp knife and a cutting board.


Preparation of the carcass and its cleaning are carried out as follows:
- Cut the ridge at the base of the head of the fish. Gently and slowly pull your head towards yourself. It will easily separate from the carcass and most of the entrails will reach for it.
- With a sharp knife, open your belly, get milk or pails with caviar.
- With the same knife, scrape off the black film and the insides that could not be pulled out with the head.
- Next remove the fins (ventral, anal and spinal). Cut tail.
- Make a longitudinal cut along the ridge almost to the bones, cutting the skin and meat. Carefully so as not to damage the fillet, remove the skin.
- Having unfolded the carcass with your belly towards you, feel for the ridge and without sharp movements separate it first from one part of the fillet and then from the other.
- Inspect the two resulting halves of herring fillet and, if there are bones left in it, remove them.
A simple way from Emma's grandmother
A former school teacher, and now a well-known Russian-speaking culinary blogger from Germany, advises to clean herring of bones in this way:
- With kitchen scissors cut off the head and tail of the fish. Make a longitudinal incision along the back and cut off the abdomen.
- Take out all the insides and remove the skin in the direction from the head to the tail.
- Moving along the ridge to separate the meat from the bones using the thumbs. If there are bones left, they can be removed with tweezers. Herring fillet is ready.
Simple and quick way with a plastic bag
It often happens that the fillet doesn’t want to separate from the bones. In this case, a method using a conventional plastic bag will come to the rescue.

The progress in this case will be as follows:
- Make a longitudinal section along the abdomen of herring. Gut all the insides, remove the dark films from the inner walls of the abdomen.
- Put the fish in a bag and beat off with the wide side of the kitchen knife. Fight off without fanaticism, but it should not be simple pats.
- Get herring from the bag. Cut off the head and tail, remove all the fins and easily separate the ridge with bones from the meat.
- Lastly, remove the peel, so the fillet will retain a more accurate shape.
Tail Fillet
In previous methods, the fillet was not separated from the bones, but the bones were pulled from the meat, but it might be easier for someone to do it the other way around.
In this case, you need:
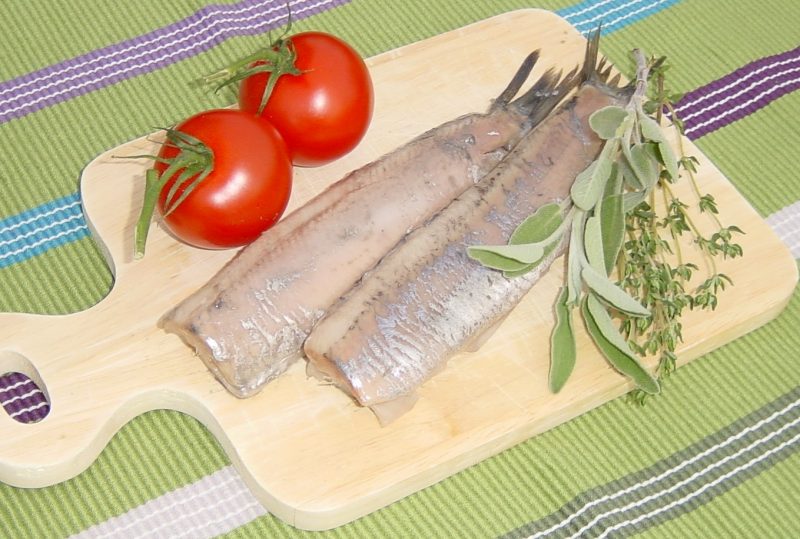
- Prepare a carcass of herring. It should remain without entrails, fins, head and skin. The tail is best left. Rinse the carcass under running water and pat dry with paper towels.
- Put the prepared herring on a cutting board. At the base of the tail with a knife, cut and separate a small piece of fillet.
- Then, with one hand, press the ridge by the tail to the board, and with the other hand, pull the meat from the bones until the fillet is completely removed.
- Repeat the same procedure with the other half of the fillet.
Punching Method
No knife or scissors are required for this cleaning method. The whole process of bone separation is done by hand. But punching has a drawback: a lot of bones will remain in the meat. Then they will need to be removed with tweezers or hands.


How to clean herring by forcing:
- Rinse the gutted herring without entrails, fins and skin in running water.
- Take the carcass in your hand so that the thumb is on top of the back, and all the rest inside. Then squeezing the fingers, using extruding movements to separate the meat from the bones. First, one half, and then the other. The fresher the fish was, the easier it will be to clean it.
How to clean herring from bones in one motion?
Does getting boneless fillet of salted herring absolutely boneless seem like something fantastic? But it is not as difficult as it seems at first glance, although it will require some sleight of hand and dexterity.
Before making the same movement, you need to gut the fish, cut the fins, separate the head from the carcass and remove the skin.
Next, take the herring with two hands by the halves of its tail, twist it in the direction away from you and, when the carcass practically returns to its original position, sharply and strongly pull the tail in different directions.
If everything was done correctly, then in one hand there will be half a clean fillet with a small piece of caudal fin, and in the other fillet with bones. From the first half you need to cut off the rest of the tail, and from the second half to separate the ridge with bones.
Such a quick method has one drawback - it is more likely to get a not beautiful, perhaps even a ragged filet. If aesthetics is not important, for example, fish will be used in a salad, then this method can be safely used.
How to get rid of small bones?
After it was possible to quickly clean the herring, the question still remains open: what to do with small bones? As a rule, there are no small bones in a filet purchased. They are soaked and dissolved during salting and ripening with citric acid.


When you buy a whole salted fish, all the bones are safe and sound, therefore, removing the ridge and large bones, you should do small ones so that no tiny bone becomes across the throat.
Normal tweezers will help remove small bones from meat fibers. It is important to remember that in the area of the ridge, the bones are very deep. Therefore, first visible bones are removed, and after that, everything that can be felt with your fingers.


