Not so long ago, figures from mastic began to be used to decorate cakes. But ordering a cake from a professional pastry chef is not always affordable, and there is no way to control the quality of the ingredients used in the process of baking and assembling the dessert. In this case, the output will be a handmade decor.
A detailed description of all stages of the work, from choosing the right tool and making mastic at home to the algorithm for sculpting individual characters, will help to overpower the sweet sculpture even for those who last sculpted in school at the lessons of fine art.
Material Content:
Figures from mastic for cake: the basics of manufacturing
Every mother wants to please her child with a beautiful and delicious cake. One of the ways to decorate it is with figures from mastic.
The manufacturing process includes the following steps:
- Preparation of sugar mass for modeling.
- Direct sculpting of figures.
- Dry the finished decor and place it on the cake.
What tools and materials will be required to create sweet sculptures will be described in more detail below.
If there is any doubt about whether it will be possible to make a mastic decor on your own, you can always pre-train on plasticine, and when you achieve the desired result, start sculpting from mastic.
What tools are needed for sculpting
In pastry shops, eyes just run up from a wide assortment of all kinds of devices for working with mastic, therefore, in order not to buy too much, it is better to familiarize yourself with what these or those tools are for.


Confectioners use mastic for such purposes:
- close-fitting of the finished cake to give the surface a smoothness or a certain texture (wood, leather, etc.);
- to create flower arrangements (sugar floristry);
- creation of miniature sculptures (people, animals, fairy-tale and cartoon characters).
Each type of mastic decor uses its own tools.
So, to cover the finished cake with sugar mass you need to have:
- rolling pin for mastic (regular or texture);
- silicone mat for rolling;
- knife;
- and ironing to smooth out the coating to avoid creases.
In sugar floristry are used:
- felling or plungers of flowers or their petals;
- silicone liners to give workpieces a more natural look;
- soft mat to thin the edges of leaves and petals;
- devices (tables) for drying workpieces,
- food wire and artificial stamens;
- brushes with artificial pile.
To sculpt figures from mastic, you need to purchase a set of special stack tools:
- Dresden stick for facial expressions;
- a stack-cone (rounded, even), which will allow you to make non-through cone-shaped recesses;
- a “shell” tool for sculpting the legs of animals, shells, human arms and legs;
- a bone stack will help create frills on clothing or wavy edges
- a tool with balls at the ends is used to form eye sockets or other circular indentations;
- stack arc to create smiles on the faces of figures of mastic people.
In addition to these tools, food colorants for coloring mastics, brushes (necessarily with artificial pile) and food glue for gluing the details of the figure will be required.
Do it yourself mastic for making
Before making figures for the cake, you need to prepare the sugar mass for modeling.

Mastic prepared from:
- 1 ½ teaspoon of instant gelatin;
- 40 ml of water;
- 3 teaspoons of liquid honey or syrup (invert, glucose or any other);
- 2 teaspoons of butter or any other hard fat (margarine, coconut oil);
- 1 teaspoon of liquor (can be replaced with other alcohol);
- 500 g of powdered sugar;
- 25 g of corn or potato starch.
Cooking Technology:
- Soak gelatin for the time specified in the instructions for its use.
- Combine syrup, oil and liquor in a saucepan and warm until smooth. Then add the swollen gelatin and warm until it is completely dissolved.
- Sift the powder with starch into a slide, in the center of which a funnel is made. Pour the liquid component into the recess and mix the mass, like a regular yeast dough.
- Put the finished mass in a dense bag, lubricated with butter from the inside, drive out all the air as much as possible and leave the mastic to rest for a day at room temperature. After that, you can begin to sculpt.
The easiest mastic figures for beginners


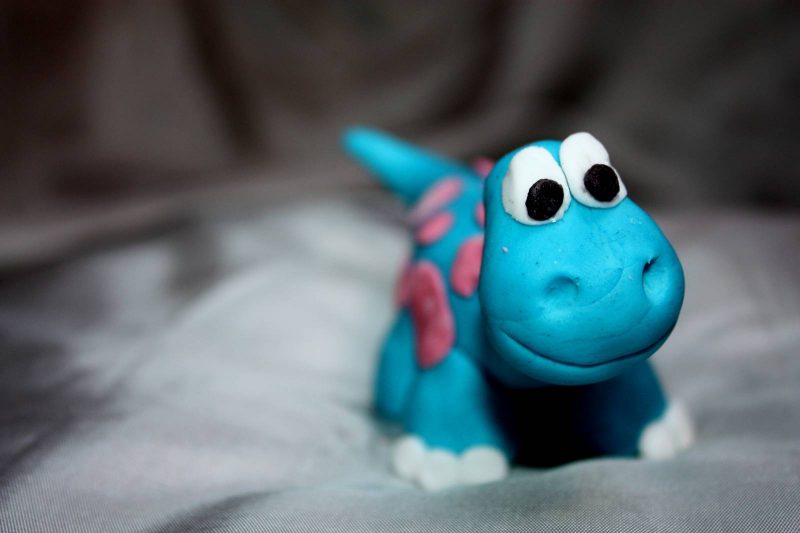
Simple animal figures that do not claim to be sculpturally similar are molded using the same technology:
- Roll a ball for the torso to give it a teardrop shape.
- The head is simply a slightly smaller ball that is connected to the body with a toothpick.
- The front and hind legs are molded from mastic flagella, which are glued with food glue or raw protein.
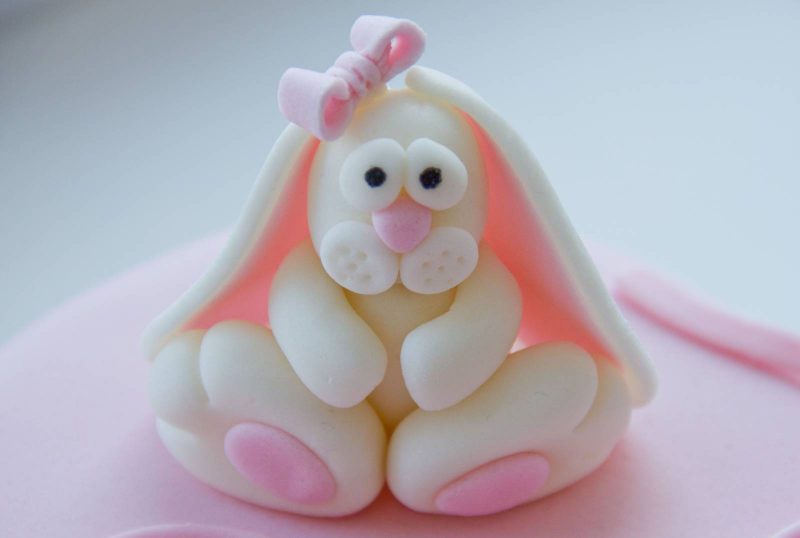
- Then the ears are molded: for a bunny - from two wide flagella-stripes, for a cat or tiger (lion) - pointed triangles, for a bear, a monkey - two circles with a depression in the center.
- Also from the flagellum, but finer, a tail is formed.If necessary, a hairdo is sculpted, for example, a mischievous forelock in a monkey or a mane in a lion.
- They finish modeling the animal figurines with the design of the muzzle - nose, mouth, eyes.
It is easy to make various machines out of mastic, which will be appropriate on the cake for the boy.
The easiest option is from a single piece of mastic:
- To give a solid rectangular piece of mastic of the corresponding color to the shape of the body of the machine.
- Of the four balls, mold the wheel washers and stick them in place.
- From thinly rolled white or pale blue mastic, cut out the glass (frontal, rear and side) and also attach them where necessary.
- Make small headlights from small balls of yellow mastic.
- Make the necessary additions, for example, inscriptions or eyes, and the machine is ready.
Master class on how to sculpt children's mastic figures
Children's figures from mastic are usually the heroes of your favorite cartoons. Among the huge number of fairies, animals, robots and cars, the heroes of the cartoon "Smeshariki" will be ideal for the novice sculptor. Their modeling is carried out according to a principle similar to that already described.
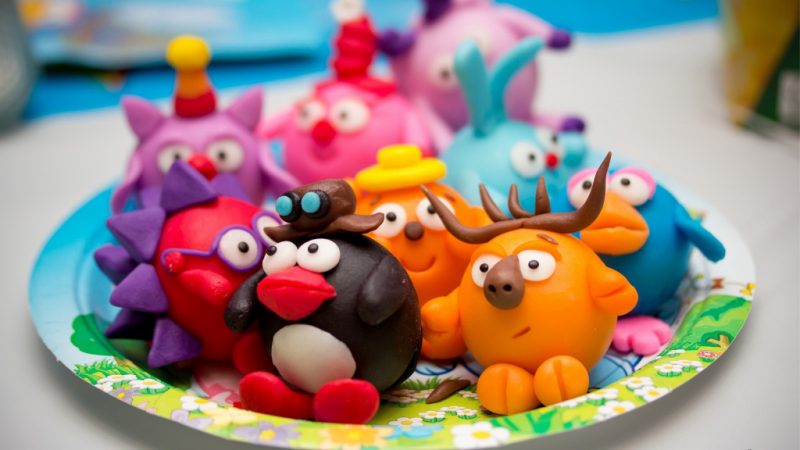
First, the mastic is painted in the desired color (or colors), then a ball-body is rolled from it, and then they act as follows:
- Bunny Krosh. For handles and legs, roll two tows, cut each of them in half and make using a stack or a regular toothpick to separate the fingers. Form two ears from two wide stripes. Then it remains only to draw a face by gluing eyes from white mastic, and eyebrows from blue - to draw pupils and a smile.
- Barash. Roll up thin flagella, form curls from them and stick them with food glue or egg white. Handles and legs are fashioned similarly to Krosh's legs, but having made a hoof at the ends. Fashion horns from flagella of darker mastic. Make a face.
- Hedgehog. Roll up small balls of blue mastic, give them the shape of cones, needles and stick them on a spherical body. Fashion handles-legs, as for a bunny. Add glasses, eyebrows, nose, ears, smile and Hedgehog is ready.
- Nyusha. First you need to draw hearts-cheeks and mold the legs with hooves, as for Barash. From a small ball to form a nose-patch, making two recesses in it with a toothpick. Weave and stick a pigtail hairstyle, make a face.
How to dry mastic figures
To fashion mastic figures is only half the battle. They must still be dried properly. When the figures dry out unevenly, they can crack, and if the drying temperature is too high, they melt, and the result of long work can not be saved. All the intricacies of this process and how to speed it up will be discussed below.


The simplest and most correct, but also the longest drying method is self-drying at room temperature. It may take up to several days to dry the figures, depending on their size.
Large figures, consisting of several parts, are usually dried apart, and then all elements are glued together using confectionery glue, raw egg white or vodka. During drying, the figures or their parts must be covered with napkins so that they do not dust. Also, the wipes will absorb some of the moisture.
If time allows, then the figures should be dried only at room temperature.
And if you urgently need to make a decoration from mastic, then you can speed up the drying in one of the following ways:
- Hair dryer. It is much faster to dry the mastic decor, blowing it at a considerable distance with a hairdryer working in the "Cold Air" mode. In this way, you can dry the figures in just a few hours.
- Oven. Using the oven, you can quickly dry flat mastic decorations (for example, letters), but the drying temperature should not be higher than 80 - 85 degrees, and its duration should not exceed 5 minutes.
- Microwave. The principle of drying is the same as in the oven. The figures warmed up in the microwave oven harden after cooling.But due to the different power of the devices, the drying time will have to be selected empirically on a small piece of the mastic mass.
How much and how such jewelry is stored
Figurines made of mastic for the cake can be prepared well in advance of baking and assembling the dessert, but to keep them soft enough inside and edible, they should be properly stored. Storage conditions for such a decor: a sealed container placed in a cool place away from direct sunlight. The shelf life of the decor, subject to these rules, will be within 1 - 2 months.
After eating dessert, sweet sugar sculptures can be left as a memory of a solemn event. In this case, the storage conditions are not so harsh: the figures can simply be put on a shelf on which direct sunlight does not fall, so that their colors stay bright longer. But eating them after that is not recommended.


